
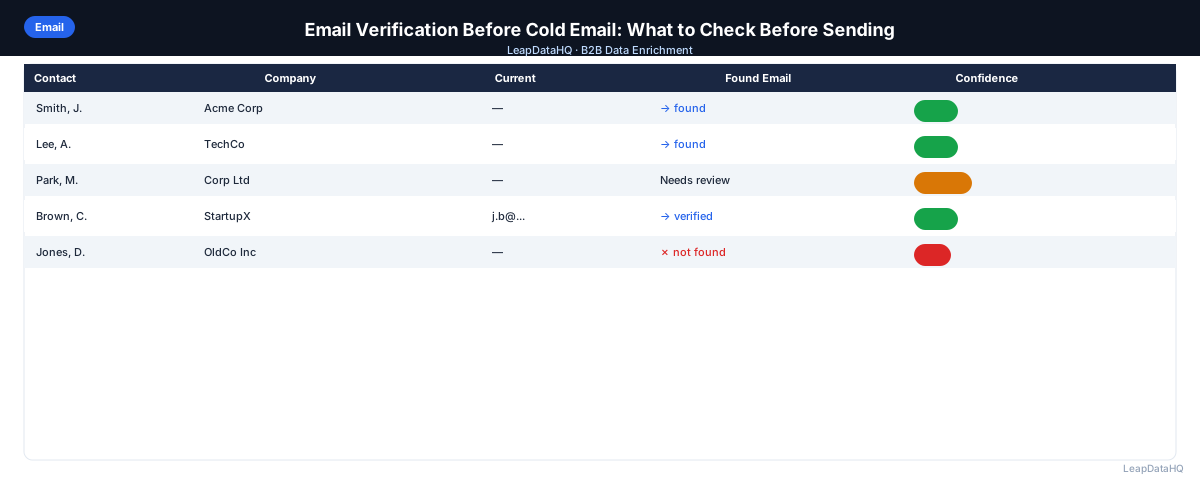
Cold email deliverability is built on sending to valid addresses. Every invalid email that bounces raises your bounce rate. A bounce rate above 2–3% triggers deliverability flags. Repeated violations push your sending domain toward blacklisting — and recovering a blacklisted domain takes months, not days.
Email verification is the step between collecting or enriching email addresses and actually sending to them. It checks whether each address is formatted correctly, whether the domain accepts email, and whether the specific mailbox exists and is active. Done before every campaign, it's the single most effective step for keeping bounce rates low and sender reputation intact.
This guide covers what email verification checks, how to run it before a cold email campaign, and what to do with the results.
The core message is that verification is not optional — it is a necessary precondition for any cold email campaign that you expect to produce consistent, repeatable results. The cost of skipping verification is higher than the cost of running it, because the damage from a single high-bounce campaign can impact your deliverability for months.
Even a small improvement in verification accuracy has an outsized impact on campaign performance. Removing 10 invalid addresses from a 200-contact list can reduce your bounce rate from 5% to under 0.5%, which is the difference between a flagged sending domain and a healthy one.
What Email Verification Actually Checks
Format Validation
The first check is whether the email address is syntactically valid: does it have an @ symbol, a local part, a domain, and a valid top-level domain? This catches obvious typos and malformed addresses that would immediately bounce. Format validation alone won't confirm deliverability but removes addresses that can never be valid.
Domain MX Record Check
After format validation, verification checks whether the domain has a mail exchange (MX) record — a DNS setting that tells other servers where to deliver email. A domain without an MX record can't receive email, regardless of how valid the address looks. This catches company domains that existed when you captured the contact but have since been shut down or redirected.
Mailbox Existence Check (SMTP Verification)
The most important check is whether the specific mailbox exists and can receive mail. Verification tools do this by connecting to the recipient's mail server and simulating the first step of sending an email (without actually sending anything). If the server confirms the mailbox exists, the address is marked valid. If the server rejects the address, it's marked invalid.
Catch-All Domain Detection
Some mail servers are configured to accept all incoming email regardless of whether the specific mailbox exists. These are called catch-all domains. Verification tools can't confirm individual mailbox existence on catch-all domains — the server says "yes" to every address regardless of whether the person is actually there.
Catch-all domain contacts are higher-risk for cold email. They may be valid, or they may bounce. Most experienced cold email senders send to catch-all contacts at lower volume and watch bounce rates more carefully than for fully verified contacts.
Step 1: Prepare Your Email List for Verification
Before running verification, do a quick format check on your list. Remove obvious issues: addresses with spaces, addresses missing @ symbols, addresses with double dots or other formatting errors. Most verification tools catch these, but removing them before upload is faster and doesn't waste verification credits.
Also remove known role-based addresses before verification. Addresses like info@, support@, sales@, admin@ rarely belong to individuals and generate spam complaints even when they're technically deliverable. Verification tools may mark these as "risky" rather than "invalid" — remove them proactively.
Step 2: Upload Your List to a Verification Tool
Ready to enrich your CSV list?
Upload a CSV, fill missing data, review confidence scores, and export clean records.
Upload a CSV — Start EnrichingUpload your email list to an email verification tool. Most tools accept CSV upload with an email column and return results with status codes for each address. Common status codes: valid, invalid, catch-all, unknown (the server didn't respond or gave an ambiguous answer), and role-based.
Step 3: Review Verification Results
After verification, segment your results:
- Valid: confirmed deliverable — include in cold email campaign
- Invalid: confirmed undeliverable — remove from campaign
- Catch-all: can't confirm individual deliverability — include at lower volume or exclude
- Unknown: server didn't respond — treat as risky, exclude from primary campaign
- Role-based: shared inboxes — remove from individual outreach campaigns
Step 4: Enrich Contacts with Replacement Emails Where Possible
For contacts whose emails came back invalid, don't simply remove them. If you have first name, last name, and company domain, run enrichment to try to find an updated email address. People who changed jobs often have new work emails findable through enrichment even after their old address goes invalid.
Step 5: Fix Remaining Bad Rows
After verification and enrichment, your list should have three segments: verified contacts (ready for outreach), catch-all and unknown contacts (monitor separately), and unresolved contacts (no valid email found). The unresolved group can be targeted through LinkedIn or set aside for a future enrichment pass with a different data source.
Step 6: Check Your Sending Setup Before Launch
Email verification confirms the recipient side — but the sender side also needs to be ready before a cold email campaign:
- SPF record: authorizes your sending domain to send email
- DKIM: adds a cryptographic signature to outgoing email that proves it wasn't tampered with
- DMARC: tells receiving servers what to do if SPF or DKIM checks fail
- Domain age: new domains under 30 days old should start with very low send volume
- Sending volume ramp: new sending accounts should start under 50 emails/day and ramp up gradually
- Unsubscribe mechanism: required by CAN-SPAM, must be functional
Step 7: Export Verified List and Launch
Export your verified list with verification status as a column. Load into your email sequencer. Set bounce threshold alerts — pause the campaign if hard bounce rate exceeds 2%. Monitor carefully on the first send day to catch any unexpected bounces before they accumulate.
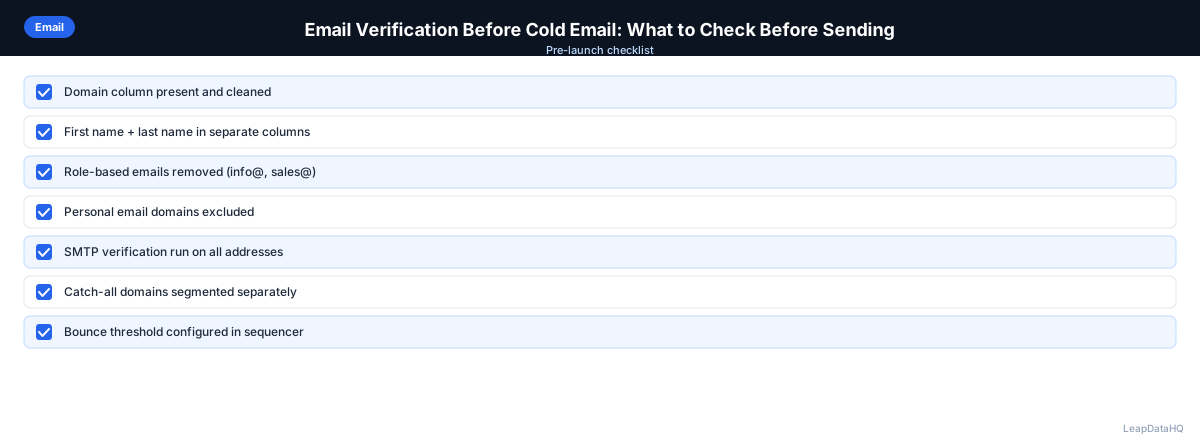
Email Verification Checklist Before Cold Email
- ☐ List de-duplicated on email column
- ☐ Role-based addresses removed (info@, support@, admin@)
- ☐ Obviously malformed addresses removed
- ☐ Email verification run on all addresses
- ☐ Invalid addresses removed from campaign list
- ☐ Catch-all addresses segmented separately
- ☐ Enrichment run on invalid contacts with name+domain available
- ☐ Sending domain SPF record configured
- ☐ Sending domain DKIM configured
- ☐ DMARC policy configured
- ☐ Unsubscribe link included in all emails
- ☐ Bounce threshold alert configured in sequencer (pause at >2%)
- ☐ Daily send volume set appropriately for domain age
When to Use LeapDataHQ
LeapDataHQ handles the enrichment step before and after email verification: enriching contacts that are missing email addresses before verification, and re-enriching contacts whose emails came back invalid during verification. Upload a CSV, find replacement emails for invalid contacts, and export a cleaner list with better deliverability.
For teams running regular cold email campaigns, pairing LeapDataHQ's enrichment with a dedicated email verification tool covers both sides of the pre-send quality workflow.
Start Enriching LeadsFrequently Asked Questions
Should I verify before or after enrichment?
Enrich first (to find missing emails), then verify (to confirm deliverability). Verifying a list that's missing emails doesn't add value for the blank rows. After enrichment adds new emails, verification confirms which enriched addresses are actually deliverable.
What bounce rate is acceptable for cold email?
Keep hard bounce rate below 2%. Most email service providers flag accounts exceeding this threshold. Some platforms pause sending automatically at 2% and suspend accounts for repeated violations. A well-verified list should produce hard bounce rates well under 1%.
What's the difference between a hard bounce and a soft bounce?
A hard bounce is a permanent delivery failure — the address doesn't exist, the domain is invalid, or the server permanently rejected the message. A soft bounce is temporary — the inbox is full, the server was temporarily unavailable. Hard bounces count most heavily against your sender reputation. Remove hard-bounced addresses immediately.
How often do I need to re-verify a list?
If a list is more than three months old, re-verify before using it again. Email addresses go inactive as people change jobs. A list verified last quarter may have 5–10% address turnover by now, and those invalid addresses will bounce if you use the list without re-checking.
Do I need to verify emails from a reputable enrichment tool?
Yes. Even high-confidence enriched emails can be inaccurate — the enrichment tool's data may lag real-world changes. Verification adds a real-time check that enrichment can't provide. Treat enrichment and verification as complementary steps, not alternatives.