
Cold email outreach is highly measurable and highly dependent on list quality. A well-prepared list with accurate emails, relevant targeting, and proper segmentation produces reply rates that justify the outreach investment. A poorly prepared list — wrong emails, mismatched targeting, no segmentation — produces bounce rates that damage deliverability and reply rates that disappoint.
The work that happens before the first email is sent determines whether the campaign succeeds. List preparation isn't a step you do quickly so you can get to the "real work." It is the real work. This guide walks through every step of preparing a B2B lead list for cold email, from the initial build through to import into your sequencer.
Each step in this workflow builds on the previous one. Skipping or rushing any step creates a downstream problem that shows up as a deliverability issue, a personalization failure, or a CRM data quality problem. Investing time in each step — targeting, sourcing, enrichment, verification, segmentation — produces campaigns that perform measurably better than those assembled quickly from a database export with no preparation.
Step 1: Define Your Target Before Building
Before sourcing a single name, write out your target precisely: the specific job titles you're reaching, the company sizes and industries that match your ICP, and the specific pain point your email addresses.
Vague targeting ("B2B decision-makers") produces unfocused lists and generic messaging. Specific targeting ("VP of Marketing at B2B SaaS companies with 50–500 employees who recently hired SDRs") produces focused lists and relevant messaging. The specificity of your targeting is directly reflected in your reply rate.
Step 2: Source Your Contacts
With your target defined, source contacts from:
- LinkedIn Sales Navigator: filter by title, company size, industry, geography, and hiring signals
- LinkedIn basic search: for smaller volumes without Sales Navigator
- Company websites: decision-maker names often findable on About pages, Leadership pages, or staff directories
- Event attendee lists: conferences and webinar attendees in your target vertical
- Industry directories and association membership lists
- Your CRM: existing contacts that match the target and haven't been recently contacted
Collect at minimum: first name, last name, company name, company domain (website), and job title. Domain is the most important field for the enrichment step — prioritize finding it.
Step 3: Build Your Spreadsheet
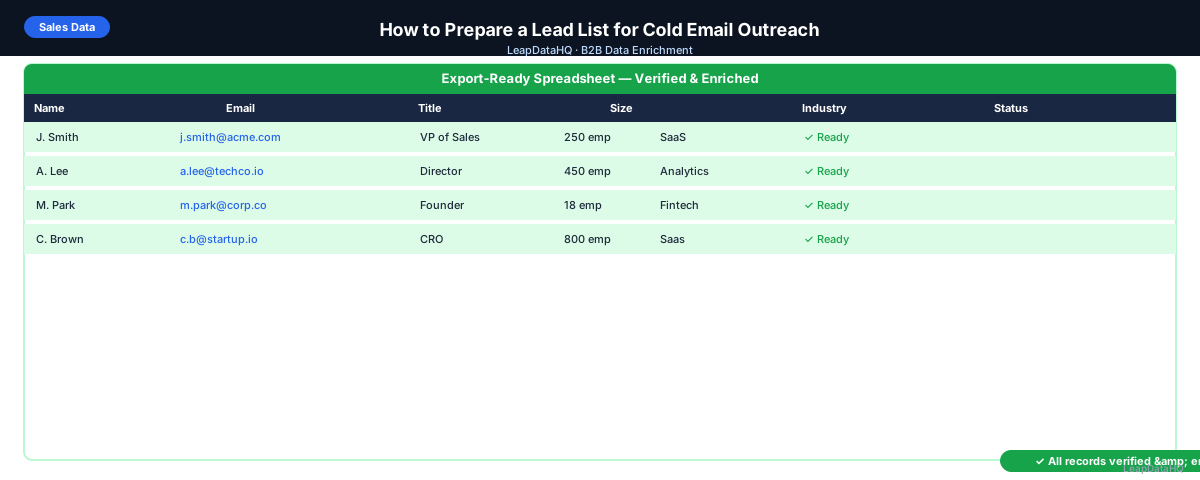
Organize your sourced contacts into a clean spreadsheet with clear column headers. Standard columns:
- First Name
- Last Name
- Company Name
- Company Domain (bare domain: acmecorp.com)
- Job Title
- Source (where you found them — useful for tracking)
Remove duplicates before enrichment. If you sourced from multiple places, the same person may appear in your list more than once. Use Remove Duplicates in Excel or Google Sheets on First Name + Last Name + Domain to catch duplicates.
Step 4: Enrich for Email Addresses
Upload your spreadsheet to an email enrichment tool. Map your columns (domain, first name, last name), run enrichment, and download results with email addresses appended.
Check the match rate and confidence distribution. Filter to high-confidence results (70%+ is a common threshold for primary campaigns). Low-confidence results can be set aside for manual research on high-priority contacts.
Step 5: Verify Emails
Run your enriched email list through a bulk email verification tool. Remove all addresses marked Invalid. Handle Catch-All addresses with caution — test a small batch before including at scale. Keep only Verified addresses in your primary outreach list.
Ready to enrich your CSV list?
Upload a CSV, fill missing data, review confidence scores, and export clean records.
Upload a CSV — Start EnrichingWhy verification matters: even high-confidence enriched emails may include addresses that have since been deactivated (the contact changed jobs) or domains with unusual mail server configurations. Verification is a live check that protects your sender reputation.
Step 6: Enrich for Personalization Fields
Use enriched company data to add fields you'll reference in your emails:
- Company size: reference their team scale in your message
- Industry: use industry-specific language and pain points
- Revenue range: calibrate your value proposition to their company tier
- Recent news or funding: mention relevant company context if available
Step 7: Segment Your List
Divide your list into segments that warrant different messaging. Common segmentation variables:
- Company size tier (1–50, 51–200, 201–1000, 1000+)
- Industry vertical
- Job title level (VP vs. Director vs. Manager)
- Geography
- Current tool or technology (if you know this from their tech stack)
Even two segments with meaningfully different messaging will outperform one large unsegmented campaign. The more relevant your message is to the specific recipient, the more likely they are to reply.
Step 8: Import and Set Up Campaign Protections
Import each segment into your email sequencer as a separate campaign. Before launching:
- Set bounce threshold: pause the campaign if bounce rate exceeds 2%
- Set daily sending limits: especially for new sending domains (start under 50/day)
- Review unsubscribe handling: ensure opt-outs are processed correctly
- Test your emails: send test emails to yourself and check rendering, links, and personalization variables
- Review sending account health: confirm your sending domain has proper DKIM/SPF/DMARC before launching
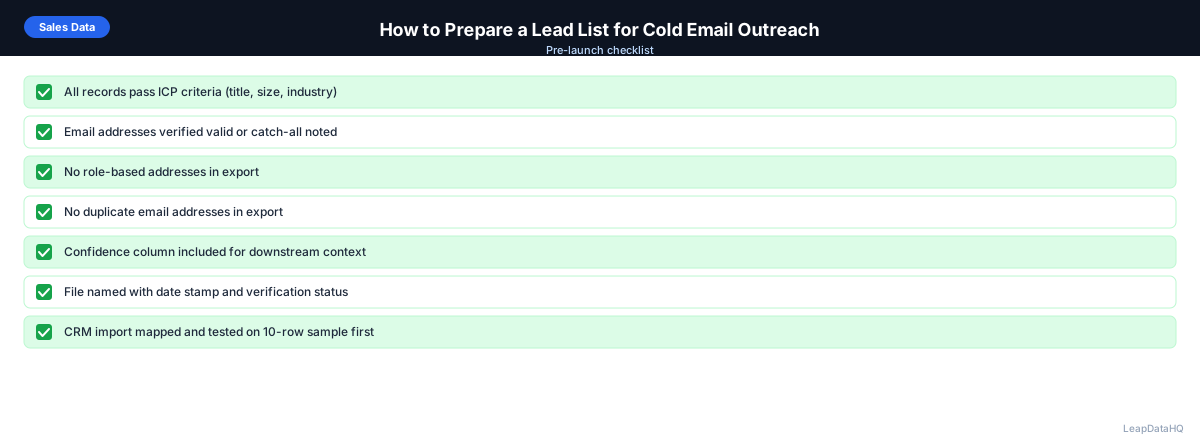
Lead List Preparation Checklist
- ICP target defined (titles, company sizes, industries)
- Contacts sourced from appropriate channels
- Spreadsheet organized with correct columns (domain, first, last, title)
- Duplicates removed before enrichment
- Enrichment run with company domain as primary key
- Confidence threshold applied — low-confidence records filtered out
- Emails verified — Invalid addresses removed
- Catch-all addresses isolated for separate testing
- Enrichment data used for segmentation
- List split into segments with targeted messaging
- Bounce threshold and daily limits set in sequencer
- Sending domain SPF/DKIM/DMARC verified before launch
Common List Preparation Mistakes
The most common mistake is treating list preparation as a one-time activity that can be reused across multiple campaigns. A list prepared for one campaign is specific to that campaign's targeting, messaging, and segmentation. Reusing a six-month-old list without re-verifying emails and re-checking ICP fit will produce worse results because contact data decays and your ICP criteria may have evolved.
Another frequent mistake is sending to a list before verification is complete. The temptation is strong — the list looks ready, the email sequence is written, the sending infrastructure is configured. But skipping the verification step means a percentage of your emails will bounce, damaging the sender reputation that took weeks or months to build. Verification is the step that protects all the work done in the previous seven steps.
When to Use LeapDataHQ
LeapDataHQ handles step 4 of this workflow: uploading your sourced contact list and getting email addresses returned with confidence scores. From there, filter to high-confidence results, run verification, segment, and load into your sequencer.
For teams building cold email campaigns regularly, LeapDataHQ fits naturally into the workflow as the enrichment step between list sourcing and outreach launch. Credit-based pricing means you only pay for matched records, and there's no monthly commitment — which works well for campaigns that run on irregular schedules.
Start Enriching LeadsFrequently Asked Questions
How many contacts should be in a cold email campaign?
Quality over quantity. A targeted list of 200 well-qualified contacts with relevant messaging will typically outperform a generic list of 2,000. Start with smaller, highly targeted lists to validate your messaging and measure reply rates before scaling to larger volumes.
How long does lead list preparation typically take?
For a 200-contact list: sourcing takes 1–3 hours depending on your research approach, enrichment takes 5–10 minutes, verification takes 5 minutes, and segmentation and import take another 30 minutes. Total: 2–4 hours for a properly prepared list. Shortcuts on this process tend to produce worse campaign results.
Should I buy a lead list instead of building one?
Purchased lists typically have lower data quality than lists you build yourself: stale emails, poor targeting fit, and high bounce rates are common. If you buy a list, treat it as a starting point that needs aggressive enrichment, verification, and quality filtering before use — not a ready-to-use file.
What bounce rate should I expect after proper list preparation?
With proper enrichment (high-confidence filter) plus email verification, expect hard bounce rates under 1% on a well-prepared list. If you're seeing above 2%, investigate: catch-all addresses being delivered, verification step skipped, or contacts who changed jobs between verification and send.
How do I track which list preparation steps I've completed?
Use a status column in your spreadsheet: Sourced, Enriched, Verified, Segmented, Imported. This makes it easy to see which step you're on and to hand off to a colleague without losing context. A checklist like the one in this guide can also serve as your process document.